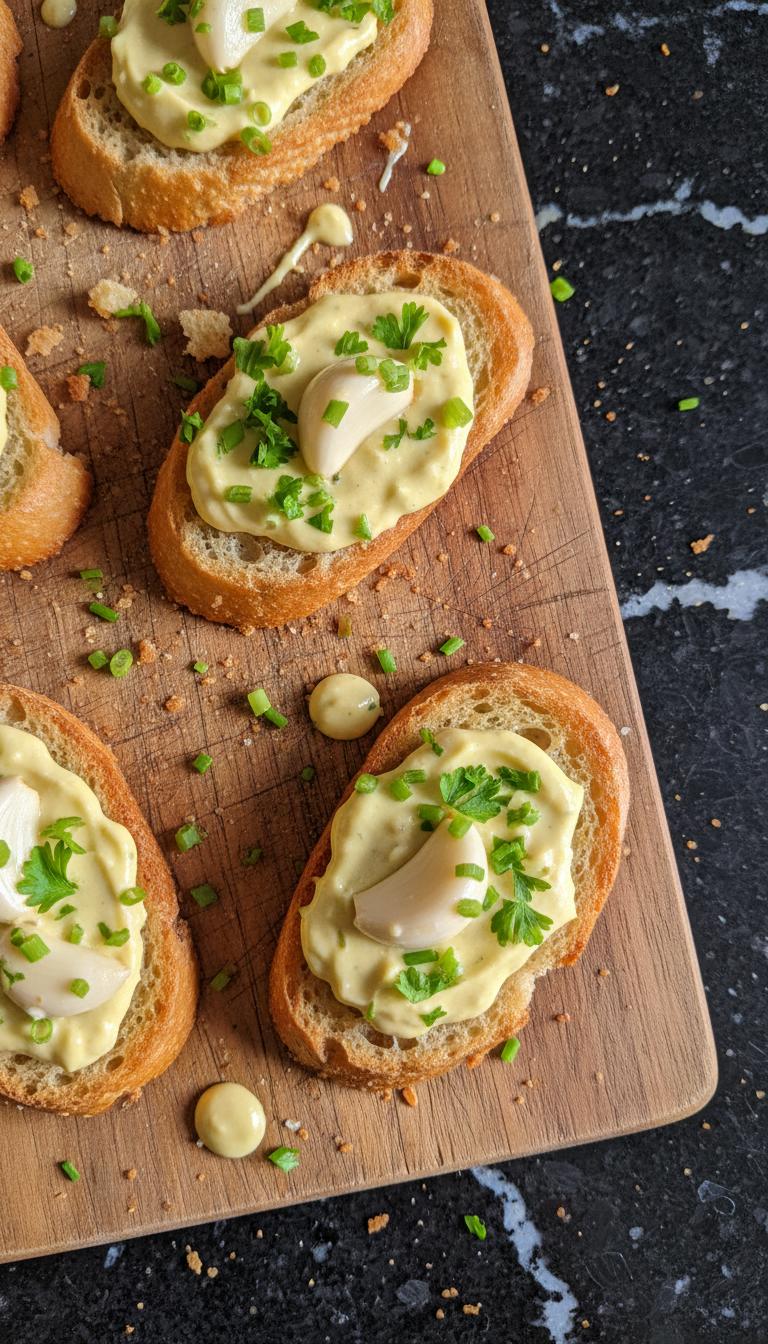
Roasted Garlic Aioli Crostini
Highlighted under: Cozy Cravings Kitchen
I absolutely adore making Roasted Garlic Aioli Crostini, especially when I want to impress guests with something simple yet sophisticated. The creamy, rich aioli, enhanced by the nutty flavor of roasted garlic, pairs perfectly with crispy toasted bread. It’s a delightful appetizer that never fails to excite the taste buds. Plus, the process is incredibly straightforward, making it a go-to for gatherings or just a cozy night in. I can’t wait for you to try making this elegant dish yourself!
When I first experimented with roasted garlic aioli, I was amazed at how transforming a single ingredient like garlic can be. Roasting it brings out a sweetness and an earthy depth that elevates the entire dish. I learned that blending the aioli until it's perfectly smooth creates that luscious texture, almost like a velvety sauce. Top it off on crisp crostini, and you have sophistication at your fingertips!
One of my favorite tips is to let the roasted garlic cool before blending it into the aioli. Cooling allows the flavors to mingle beautifully without overpowering each other. I still remember the first time I served these crostini at a dinner party; they disappeared within minutes, leaving everyone wanting more. It’s a testament to how simple ingredients can turn into something truly magical.
Why You Will Love This Recipe
- Rich and nutty flavor from roasted garlic
- Creamy and luscious aioli texture
- Perfectly pairs with crispy crostini for a delightful appetizer
Understanding Roasted Garlic
Roasting garlic transforms its raw, pungent flavor into a sweet, nutty essence. When you roast it, the heat breaks down the allicin compounds, which are responsible for garlic's sharpness. Instead, you’ll experience a mellow garlic note that enhances the overall flavor of your aioli. Make sure to wrap the garlic tightly in foil to keep the moisture in, allowing it to become perfectly soft and spreadable after 30 minutes in the oven at 400°F.
It's essential to use fresh garlic for the best results; older garlic can lack the depth of flavor you want. If you're short on time, consider using pre-roasted garlic from a jar, but keep in mind that homemade provides a more vibrant taste. Don't be afraid to experiment by adding herbs or spices to the roasting process—garlic pairs wonderfully with rosemary or thyme, adding another layer of flavor to your aioli.
Perfecting the Aioli Texture
To ensure a glossy and thick aioli, room temperature mayonnaise is crucial. If the mayonnaise is too cold, it can cause the fat to seize, leaving you with a grainy texture instead of the creamy consistency you want. Once combined, blend the aioli until smooth, adjusting the lemon juice for brightness and the Dijon mustard for a touch of zing. Taste as you go to find the perfect balance between acidity and richness.
If you prefer a lighter version, you can substitute half of the mayonnaise with Greek yogurt. This will maintain the creamy texture while adding a tangy flavor that complements the roasted garlic beautifully. Just remember, if you make this substitution, it may alter the aioli's color slightly, but the flavor will remain delightful.
Serving Suggestions and Storage Tips
Crostini are best served fresh right out of the oven, with that delightful crunch to contrast the aioli's creaminess. However, if you’re preparing for a gathering, you can toast the bread in advance and store it in an airtight container. Just re-crisp in a 350°F oven for about 5 minutes before serving to restore that great texture.
If you have leftover aioli, it can be stored in an airtight container in the refrigerator for up to a week. It also works wonderfully as a dip for vegetables or a sandwich spread. Consider mixing in fresh herbs or a splash of hot sauce to create variations for future meals. Remember that roasted garlic flavor intensifies after resting, making it even more delightful after a day!
Ingredients
Gather the following ingredients to create these delicious crostini:
For the Aioli:
- 1 head of garlic
- 1 cup mayonnaise
- 1 tablespoon lemon juice
- 1 teaspoon Dijon mustard
- Salt and pepper to taste
For the Crostini:
- 1 baguette, sliced into thin rounds
- 2 tablespoons olive oil
- Fresh parsley for garnish
These fresh ingredients will work together to create a deliciously creamy aioli and crispy crostini.
Instructions
Follow these simple steps to make your Roasted Garlic Aioli Crostini:
Roast the Garlic
Preheat your oven to 400°F (200°C). Cut the top off the head of garlic, drizzle with olive oil, wrap in foil, and roast for 30 minutes until soft and fragrant.
Make the Aioli
Once the garlic has cooled, squeeze the roasted cloves into a bowl, and combine with mayonnaise, lemon juice, Dijon mustard, salt, and pepper. Blend until smooth.
Prepare the Crostini
Brush the baguette slices with olive oil and arrange them on a baking sheet. Bake in the oven until golden and crispy, about 10 minutes.
Assemble and Serve
Spread the roasted garlic aioli generously over each crostini, garnish with fresh parsley, and enjoy!
With these steps, you'll create a mouthwatering appetizer that will impress everyone!
Pro Tips
- For an extra kick, consider adding a pinch of smoked paprika to the aioli or a sprinkle on top just before serving.
Ingredient Substitutions
If you don’t have a whole head of garlic available, pre-peeled garlic cloves can be roasted; just reduce the cooking time to about 20 minutes or until they are soft. If you want to avoid mayonnaise entirely, you can use avocado for a dairy-free version. The creamy texture of mashed avocado works surprisingly well, although it will impart a different flavor profile.
For those preferring a kick, try adding a teaspoon of sriracha or chipotle powder into the aioli mixture. This will not only enhance the flavor but will also add a vibrant color to the dip, making it visually appealing for gatherings. Alternatively, incorporate herbs like basil or cilantro to blend global flavors into your aioli.
Troubleshooting Common Issues
If your aioli turns out too thin, consider incorporating a bit more mayonnaise to thicken it up. Another way to achieve a thicker texture is to add a bit of cornstarch slurry; simply mix 1 teaspoon of cornstarch with cold water and whisk it into your aioli while blending. This not only thickens but also helps stabilize the mixture.
When roasting garlic, keep an eye on it to avoid burning, as burnt garlic can introduce a bitter taste that may dominate your aioli. If you notice it starting to char at the edges, remove it promptly to prevent it from affecting the flavor. The ideal roasted garlic will appear soft and caramelized, giving it that sweet fragrance and rich essence.
Scaling the Recipe
Scaling up for larger gatherings is easy—just multiply the ingredients while maintaining the same ratios. For each additional head of garlic, increase the mayo and the other components correspondingly, ensuring that the balance of flavors is preserved. This is particularly useful if you are hosting a party where an appetizer like this is expected to go quickly.
When doubling or tripling the aioli ingredients, it might require a larger mixing bowl to achieve the right consistency. You can also prepare the aioli a day in advance; flavors develop further overnight, giving you a delicious dip that’s ready to serve when needed. Just remember to refrigerate it promptly after making.
Questions About Recipes
→ Can I make the aioli in advance?
Absolutely! The flavor of the aioli actually improves after being refrigerated for a few hours.
→ What can I substitute if I don’t have mayonnaise?
You can use Greek yogurt for a lighter option or a vegan mayonnaise for a plant-based alternative.
→ How do I store leftover aioli?
Store any leftover aioli in an airtight container in the refrigerator for up to a week.
→ Can I use a different type of bread?
Yes! You can use any crusty bread or even gluten-free options as needed.

Roasted Garlic Aioli Crostini
Created by: The Dailydishrecipes Team
Recipe Type: Cozy Cravings Kitchen
Skill Level: Intermediate
Final Quantity: 4 servings
What You'll Need
For the Aioli:
- 1 head of garlic
- 1 cup mayonnaise
- 1 tablespoon lemon juice
- 1 teaspoon Dijon mustard
- Salt and pepper to taste
For the Crostini:
- 1 baguette, sliced into thin rounds
- 2 tablespoons olive oil
- Fresh parsley for garnish
How-To Steps
Preheat your oven to 400°F (200°C). Cut the top off the head of garlic, drizzle with olive oil, wrap in foil, and roast for 30 minutes until soft and fragrant.
Once the garlic has cooled, squeeze the roasted cloves into a bowl, and combine with mayonnaise, lemon juice, Dijon mustard, salt, and pepper. Blend until smooth.
Brush the baguette slices with olive oil and arrange them on a baking sheet. Bake in the oven until golden and crispy, about 10 minutes.
Spread the roasted garlic aioli generously over each crostini, garnish with fresh parsley, and enjoy!
Extra Tips
- For an extra kick, consider adding a pinch of smoked paprika to the aioli or a sprinkle on top just before serving.
Nutritional Breakdown (Per Serving)
- Calories: 230 kcal
- Total Fat: 20g
- Saturated Fat: 3g
- Cholesterol: 10mg
- Sodium: 180mg
- Total Carbohydrates: 14g
- Dietary Fiber: 1g
- Sugars: 1g
- Protein: 3g