Chocolate Dessert Board Inspiration: An Incredible Ultimate Guide with 5 Tips
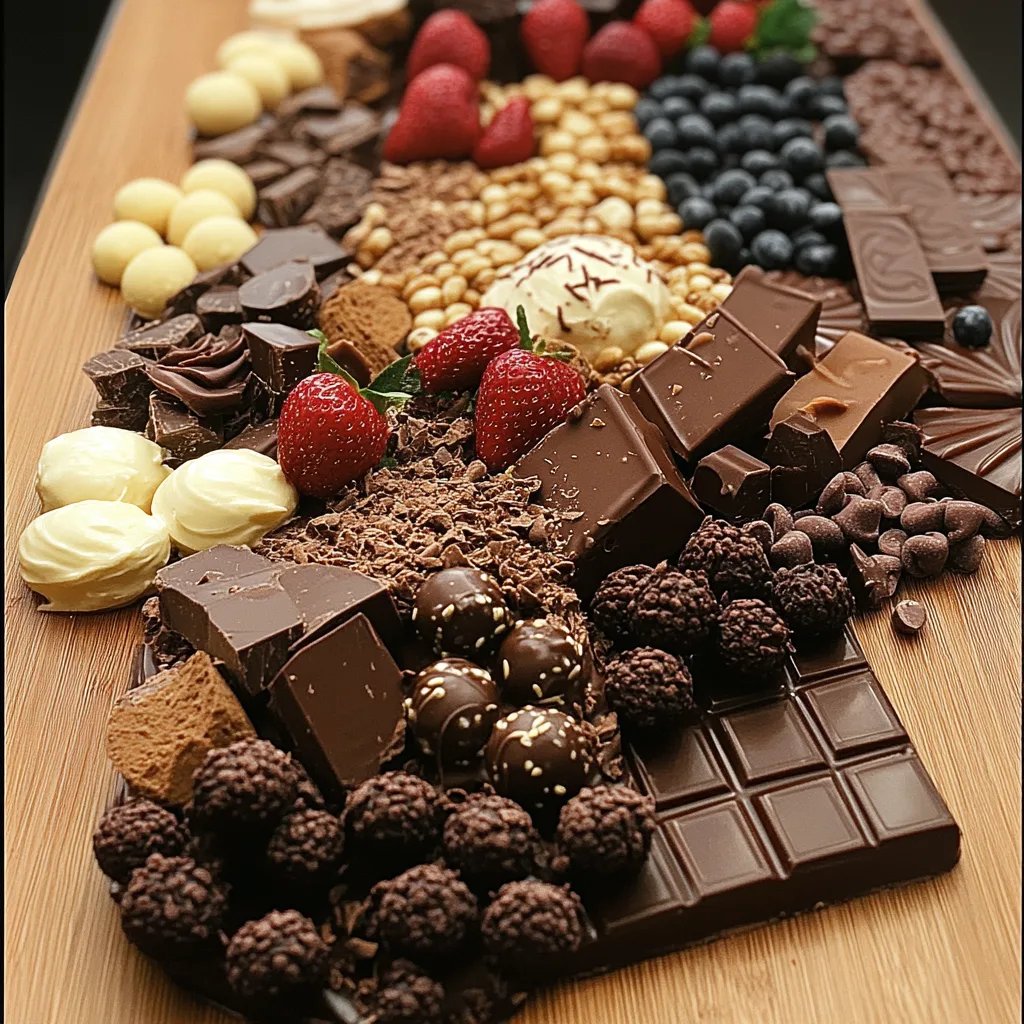
Chocolate Dessert Board Inspiration is a delightful way to celebrate your love for chocolate. This delicious presentation goes beyond the standard dessert plate, inviting creativity and imagination. As an ultimate guide, it encourages customization and personal touches that reflect your style. Picture an array of chocolates, fruits, nuts, and sweet dips arranged beautifully on a board, enticing everyone to indulge. Not only is it visually stunning, but the combination of flavors and textures makes for an incredible treat that everyone will love.
Creating a chocolate dessert board is perfect for gatherings, celebrations, or just a casual evening with friends. The beauty of this dessert is its versatility. You can mix and match ingredients to suit different tastes and dietary needs. From dark chocolate lovers to those who prefer white chocolate, there’s something for everyone. This guide provides comprehensive insights into why you’ll love this idea, how to craft it, and tips for serving it beautifully.
In addition, the process of creating a chocolate dessert board is as enjoyable as indulging in it. Whether you are a seasoned host or a novice in the kitchen, this guide will walk you through the essentials. By the end, you’ll be inspired to throw together your own incredible chocolate dessert board. So, let’s dive into this sweet adventure and see how you can create a stunning chocolate dessert display!
Why You’ll Love This Recipe
Creating a chocolate dessert board is not just about the end result; it’s a fun experience. Here’s why you’ll fall in love with this concept:
1. Endless Customization: Choose your favorite chocolates, fruits, and add-ons to make it uniquely yours.
2. All About Presentation: The board looks visually appealing, making it perfect for gatherings or special occasions.
3. Variety for Everyone: You can include something for everyone, from milk chocolate to dark chocolate and fruit options.
4. Quick Preparation: Unlike traditional baking, you can assemble your board in a matter of minutes.
5. Interactive Experience: Guests can pick and choose their favorite items, making it an enjoyable experience.
With these fantastic benefits, it’s no wonder that more people are opting for chocolate dessert boards at their gatherings. No matter the occasion, these boards create a fun and inviting atmosphere!
Preparation and Cooking Time
Creating your chocolate dessert board is quick and easy. Here’s a simple breakdown of preparation time:
– Preparation Time: 20-30 minutes
– Assembling Time: 10 minutes
– Total Time: 30-40 minutes
This time can vary depending on how elaborate you want your board to be. The beauty of it is that it’s all about your creativity and willingness to experiment with different flavors and textures.
Ingredients
– Various types of chocolate (milk, dark, white, and flavored)
– Fresh fruits (strawberries, bananas, apples, cherries)
– Nuts (almonds, cashews, walnuts)
– Dried fruits (apricots, raisins, cranberries)
– Sweet dips (caramel sauce, chocolate sauce, Nutella)
– Cookie or brownie bites
– Mini marshmallows
– Edible flowers (optional for decoration)
These ingredients provide a delightful array of flavors and textures that will make your board truly irresistible. You can adjust portions based on how many people you are serving.
Step-by-Step Instructions
Creating your chocolate dessert board involves simple steps that anyone can follow. Here’s how you can assemble a chocolate dessert board:
1. Choose Your Board: Start with a large wooden cutting board or a platter. Make sure it has enough space for all your ingredients.
2. Select Your Chocolates: Decide which types of chocolate you want to include. Break or slice larger pieces into bite-sized chunks and arrange them on the board.
3. Add Fresh Fruits: Wash and prepare your fruits. Arrange them around the chocolates for a colorful display.
4. Incorporate Nuts: Place small bowls or piles of nuts next to the fruits and chocolates. This adds texture and crunch.
5. Include Sweet Dips: Add bowls of sweet dips like caramel or chocolate sauce at various spots on the board. They should be easily accessible for guests to use.
6. Fill With Cookie/Brownie Bites: Place cookie or brownie bites on the board, filling in any gaps for a more abundant look.
7. Add Dried Fruits & Mini Marshmallows: Sprinkle dried fruits and mini marshmallows around the board, enhancing both flavor and decoration.
8. Final Touches: For an extra touch of elegance, decorate the board with edible flowers or greenery to create a beautiful presentation.
Following these simple steps ensures that your chocolate dessert board is not only delicious but also visually stunning and inviting.
How to Serve
Serving your chocolate dessert board is key to impressing your guests. Here are a few tips for making your presentation even more appealing:
1. Choose the Right Location: Place the board on a central table to attract attention. Good lighting can enhance its visual appeal.
2. Offer Serving Utensils: Provide small spoons, tongs, or skewer sticks for guests to serve themselves easily.
3. Pairing Beverage Options: Consider offering drink options that pair well with chocolate, such as coffee, hot chocolate, or dessert wine.
4. Create a Themed Setting: If your event has a theme, you can decorate the area or board accordingly, making it feel cohesive.
5. Encourage Sharing: Provide small plates or napkins for guests to create their own mini dessert plates, making the experience interactive and fun.
Serving your chocolate dessert board with these thoughtful touches ensures an enjoyable experience for you and your guests!
Creating a chocolate dessert board is not just about the chocolate; it’s about the experience, the presentation, and the joy shared with loved ones. These boards inspire creativity and offer a myriad of flavors that everyone can enjoy. With a little effort, you can craft a stunning display that leaves lasting impressions!
Additional Tips
– Use Fresh Fruits: Ensure your fruits are ripe and fresh for the best flavor. This enhances both taste and presentation.
– Mix Textures: Incorporate a variety of textures, including creamy chocolates and crunchy nuts. This makes your board more interesting.
– Labeling: If you include various types of chocolates or dip options, consider labeling them. It helps guests know what they’re choosing.
– Seasonal Touch: Utilize seasonal fruits and flowers to create a board that reflects the current time of year.
– Keep It Cool: If it’s warm, consider chilling your board before serving, especially if using chocolate that can melt easily.
Recipe Variation
There’s so much room for creativity! Here are a few variations to try:
1. Gourmet Chocolate Board: Include artisan chocolates and specialty items like sea salt or flavored truffles.
2. Vegan Version: Use dairy-free chocolates and plant-based dips, ensuring that everything complies with vegan dietary restrictions.
3. Savory Twist: Add some savory options, like cheese or charcuterie items, to balance the sweetness.
4. Flavored Fruits: Consider using dried fruits that are flavored, such as cinnamon apples or chocolate-covered strawberries for added luxury.
5. Spice It Up: Add in some cayenne pepper or sea salt to dark chocolate for a spicy kick.
Freezing and Storage
– Storage: Keep any leftover items in airtight containers in the fridge. They should be consumed within a few days for the best flavor.
– Freezing: While it’s best to assemble the board fresh, leftover chocolates can be frozen. Ensure they are wrapped properly to prevent freezer burn.
Special Equipment
No special equipment is required to create your chocolate dessert board. However, a few handy tools can make the process smoother:
– Large wooden board or platter for assembling
– Sharp knife for cutting fruits and chocolates
– Small bowls for dips and nuts
– Spoons or tongs for serving
– Plastic wrap or aluminum foil for storing leftovers
Frequently Asked Questions
Can I use store-bought items for my chocolate dessert board?
Absolutely! Store-bought treats can save you time and still look fantastic.
How do I make my board look more full?
Fill in gaps with smaller items like mini marshmallows or nuts, and utilize varying heights for visual interest.
What if my guests have allergies?
Always check for allergies and consider labeling all items. You can also create a separate allergy-friendly board.
Can I make it ahead of time?
You can prepare certain components ahead of time, such as washing and cutting fruit. Assemble the board close to serving time to maintain freshness.
How do I clean up the board after use?
Simply scrape off any leftover ingredients, wash with warm soapy water, and dry thoroughly before storing.
Conclusion
A chocolate dessert board is more than a treat; it’s an experience that encourages sharing and creativity. With endless variations and customizable options, you can create something unique for every gathering. From gorgeous displays to delicious bites, a chocolate dessert board will surely impress everyone. As you gather your favorite chocolates and toppings, remember that it’s all about enjoying the process and delighting your guests in a sweet, indulgent adventure.