Artisan Bread Recipe: An Amazing Ultimate Guide to 1 Loaf
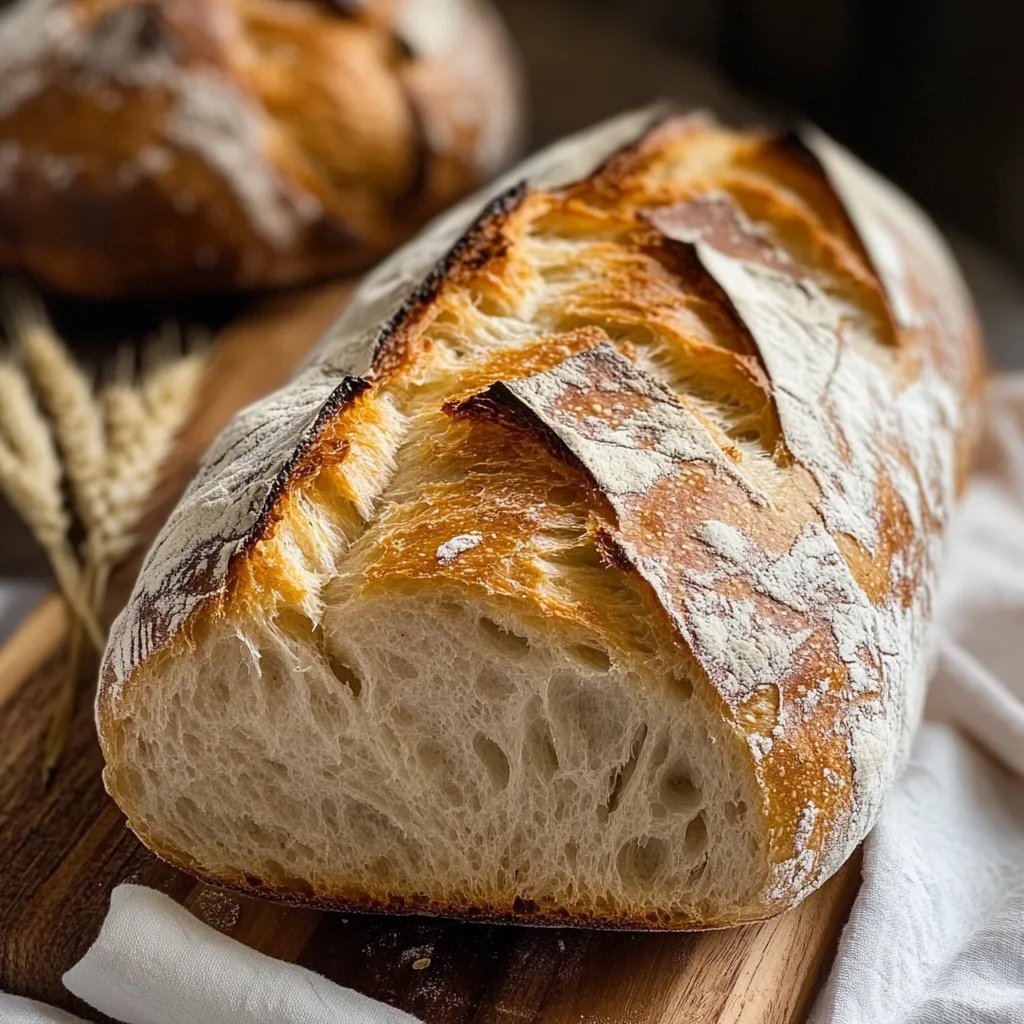
Artisan bread recipe brings the incredible tastes and textures of freshly baked bread right into your kitchen. With its crunchy crust and soft, chewy interior, this bread is a fantastic way to elevate any meal or occasion. Imagine the scent of fresh bread wafting through your home—a sensory experience that invites everyone to gather around the table.
Homemade artisan bread is not only delicious; it is also relatively straightforward to prepare. The best part? You don’t need fancy ingredients or equipment. Just a handful of staples and a bit of patience will yield a loaf that rivals the best bakery options. Over the years, many have found joy in baking artisan bread, relishing in the satisfying process and the ultimate reward of a warm loaf.
If you’ve ever eaten a slice of freshly baked artisan bread, you’ll know how transformative it can be. It’s about so much more than just bread—it’s about the experience of creating something wonderful from scratch. In this article, you will discover an easy artisan bread recipe that delivers amazing results, perfect tips for success, and ways to serve your freshly baked masterpiece.
Why You’ll Love This Recipe
This artisan bread recipe stands out for numerous reasons. With its simple ingredients and straightforward instructions, it’s a perfect choice for both novice and experienced bakers alike. Here are some reasons you’ll love writing this recipe into your baking repertoire:
1. Minimal Ingredients – The bread requires basic ingredients you likely already have at home.
2. Quick and Easy – The process entails simple steps that don’t demand professional baking skills.
3. Versatile Flavor – You can adapt the recipe to include herbs, seeds, or other flavors as desired.
4. Healthier Option – Homemade bread doesn’t contain preservatives or additives that store-bought versions might have.
5. Satisfying – There’s something profoundly rewarding about baking your own bread; it’s comforting and gratifying.
6. Perfect for Sharing – A loaf of fresh bread is perfect for gifts, gatherings, or simply treating yourself to a homemade delight.
This artisan bread recipe offers not just a food item, but an experience that nurtures both body and soul. You’ll soon see how each crusty slice becomes something to celebrate!
Preparation and Cooking Time
Making artisan bread is a process that requires a little time, patience, and attention, but the results are worth it! Here’s a breakdown of the preparation and cooking time involved:
– Preparation Time: 20 minutes
– Rising Time: 12-18 hours (this is where the magic happens!)
– Baking Time: 30-40 minutes
In total, you can expect the entire process to take about 13 to 19 hours, although most of that time is passive, thanks to the long rising period.
Ingredients
– 3 cups all-purpose flour
– 1 ½ teaspoons salt
– ½ teaspoon instant yeast
– 1 ½ cups warm water (around 110°F or 43°C)
Step-by-Step Instructions
Follow these simple steps to create an incredible loaf of artisan bread:
1. Mix Dry Ingredients: In a medium-sized bowl, combine the flour, salt, and instant yeast thoroughly.
2. Add Water: Pour in the warm water and mix with a wooden spoon or spatula until all the flour is hydrated. The dough will be sticky and rough.
3. Initial Rise: Cover the bowl with plastic wrap or a clean kitchen towel. Allow the dough to rise at room temperature for 12 to 18 hours, until bubbles form on the surface.
4. Prepare for Shaping: After the dough has risen, generously flour a work surface. Turn the dough out onto the floured surface, being careful not to deflate it too much.
5. Shape the Dough: With floured hands, fold the edges of the dough toward the center and form a ball. Let it rest for about 15-30 minutes.
6. Preheat Oven: Preheat your oven to 450°F (232°C). Place a Dutch oven or heavy pot with a lid inside to heat up as well.
7. Final Shape and Rest: Carefully transfer the dough to a parchment paper-lined bowl or surface. Cover with a towel and let it rest while the oven is heating (about 30 minutes).
8. Transfer to Pot: When the oven is hot, carefully remove the Dutch oven. Lift the dough using the parchment paper and place it into the pot. Cover with the lid.
9. Bake: Bake covered for 30 minutes. Then, uncover and bake for an additional 15-20 minutes, until the crust is golden brown.
10. Cool: Remove the bread from the oven and let it cool on a wire rack for at least 30 minutes before slicing. This allows the interior to set properly.
These steps will guide you in crafting an exquisite loaf of artisan bread that is sure to impress!
How to Serve
Once your artisan bread is ready, consider these delightful serving suggestions:
1. Simple Slices: Serve warm slices with a pat of butter or a drizzle of olive oil for a simple yet satisfying snack.
2. With Soups and Stews: Pair it with hearty soups or stews. The crusty exterior is perfect for dipping.
3. Charcuterie Board: Add it to a charcuterie or cheese board. The bread complements various cheeses and cured meats beautifully.
4. Bruschetta: Toast slices topped with fresh tomatoes, basil, and olive oil for a delicious appetizer.
5. Sandwiches: Use slices to create gourmet sandwiches filled with your favorite fillings.
By serving the bread thoughtfully, you enhance the experience, making every bite memorable.
Additional Tips
– Use High-Quality Flour: Opt for unbleached all-purpose flour for a richer flavor and better texture in your artisan bread.
– Don’t Rush the Rising Time: Allow the dough to rise as long as necessary, as this develops flavor and improves texture.
– Experiment with Hydration: Vary the water content for different textures; more water can yield an airier bread.
– Incorporate Seeds or Nuts: Mixing in seeds, nuts, or herbs will add unique flavors and textures to your bread.
– Use a Baking Stone: If you have one, using a baking stone can help achieve a perfect crust by providing steady heat.
Recipe Variation
Feel free to customize the recipe to suit your taste preferences! Here are several variations you may want to try:
1. Herb-Infused Version: Add dried herbs like rosemary or thyme to the flour mixture for a fragrant twist.
2. Sweet Bread: Incorporate a little sugar and cinnamon to create a sweet version, perfect for breakfast or brunch.
3. Cheesy Delight: Fold in shredded cheese before the final rise for a savory bread that’s great as a snack.
Freezing and Storage
– Storage: Keep your artisan bread wrapped in a clean kitchen towel or stored in a bread bag. It can last for 3-4 days at room temperature.
– Freezing: To freeze, slice the bread and wrap pieces individually in plastic wrap and then in aluminum foil. It can be stored for up to 3 months. To defrost, simply leave it at room temperature for a few hours or warm it in a low oven.
Special Equipment
You don’t need much special equipment for this artisan bread recipe, but the following tools can help:
– Large mixing bowl
– Wooden spoon or spatula for mixing
– Clean kitchen towel or plastic wrap for covering the dough
– Parchment paper for transferring to the pot
– Dutch oven or heavy pot with a lid for baking
– Wire rack for cooling
Frequently Asked Questions
Can I use bread flour instead of all-purpose flour?
Yes, bread flour can be used to achieve a chewier texture due to its higher protein content.
How can I tell if my bread is done baking?
The bread is ready when it’s golden brown and sounds hollow when tapped on the bottom.
Why is my dough too sticky?
If your dough is too sticky, it may need a little more flour, but be careful not to add too much, as it can affect the bread’s texture.
Can I make this recipe gluten-free?
Yes, use a gluten-free all-purpose flour blend designed for baking to accommodate dietary needs.
What can I do if my bread doesn’t rise?
Ensure your yeast is active and check the temperature of your environment. Dough typically rises best in a warm, draft-free area.
Conclusion
Baking artisan bread at home is not only achievable, but it is also a delightful culinary adventure. Following this artisan bread recipe will lead you to a crusty, flavorful loaf that can elevate any meal. Whether you enjoy it with soup, a hearty stew, or several other delightful pairings, the warm, freshly baked bread is something you, your family, and friends will truly appreciate. Follow the tips, explore variations, and enjoy this satisfying experience of baking from scratch. Happy baking!